
Rush SR: Steering Knuckle Upgrade
As we head into a season of supporting Grant Bourne track side competing in a Rush SR with the GridLife Rush National Series we’ve been looking at the vehicle and getting some testing time in. One of the weak points in the Rush SR appears to be an increasing amount of play in the steering column. There are two knuckles which rather quickly develop “slop”. In fact while speaking with other Rush drivers, many choose to “get used to it”. In speaking with John from Rush of the Carolinas, he has a MUCH better solution. He sells a set of upgrade bearings which make an incredible difference. Reach out to them. They keep these caps in stock.
Overall the installation is pretty simple. Here’s some photos and some tips for replacing the caps.
Steering Knuckle Upgrade Steps:

Step 1: Wheels straight and steering wheel centered. Remove the steering wheel if installed.
Remove the steering column from the vehicle. To do this, simply remove the 5 bolts circled in purple and then loosen the two set screws (circled in blue). The 5 bolts will remove the mount plate and the 2 set screws allow you to pull the column off the steering rack.
Update: John from Rush of the Carolinas points out that each end of the knuckle has set screws so you can loosen these and shimmy the knuckle out leaving the 5 bolts in place. Choice is yours.
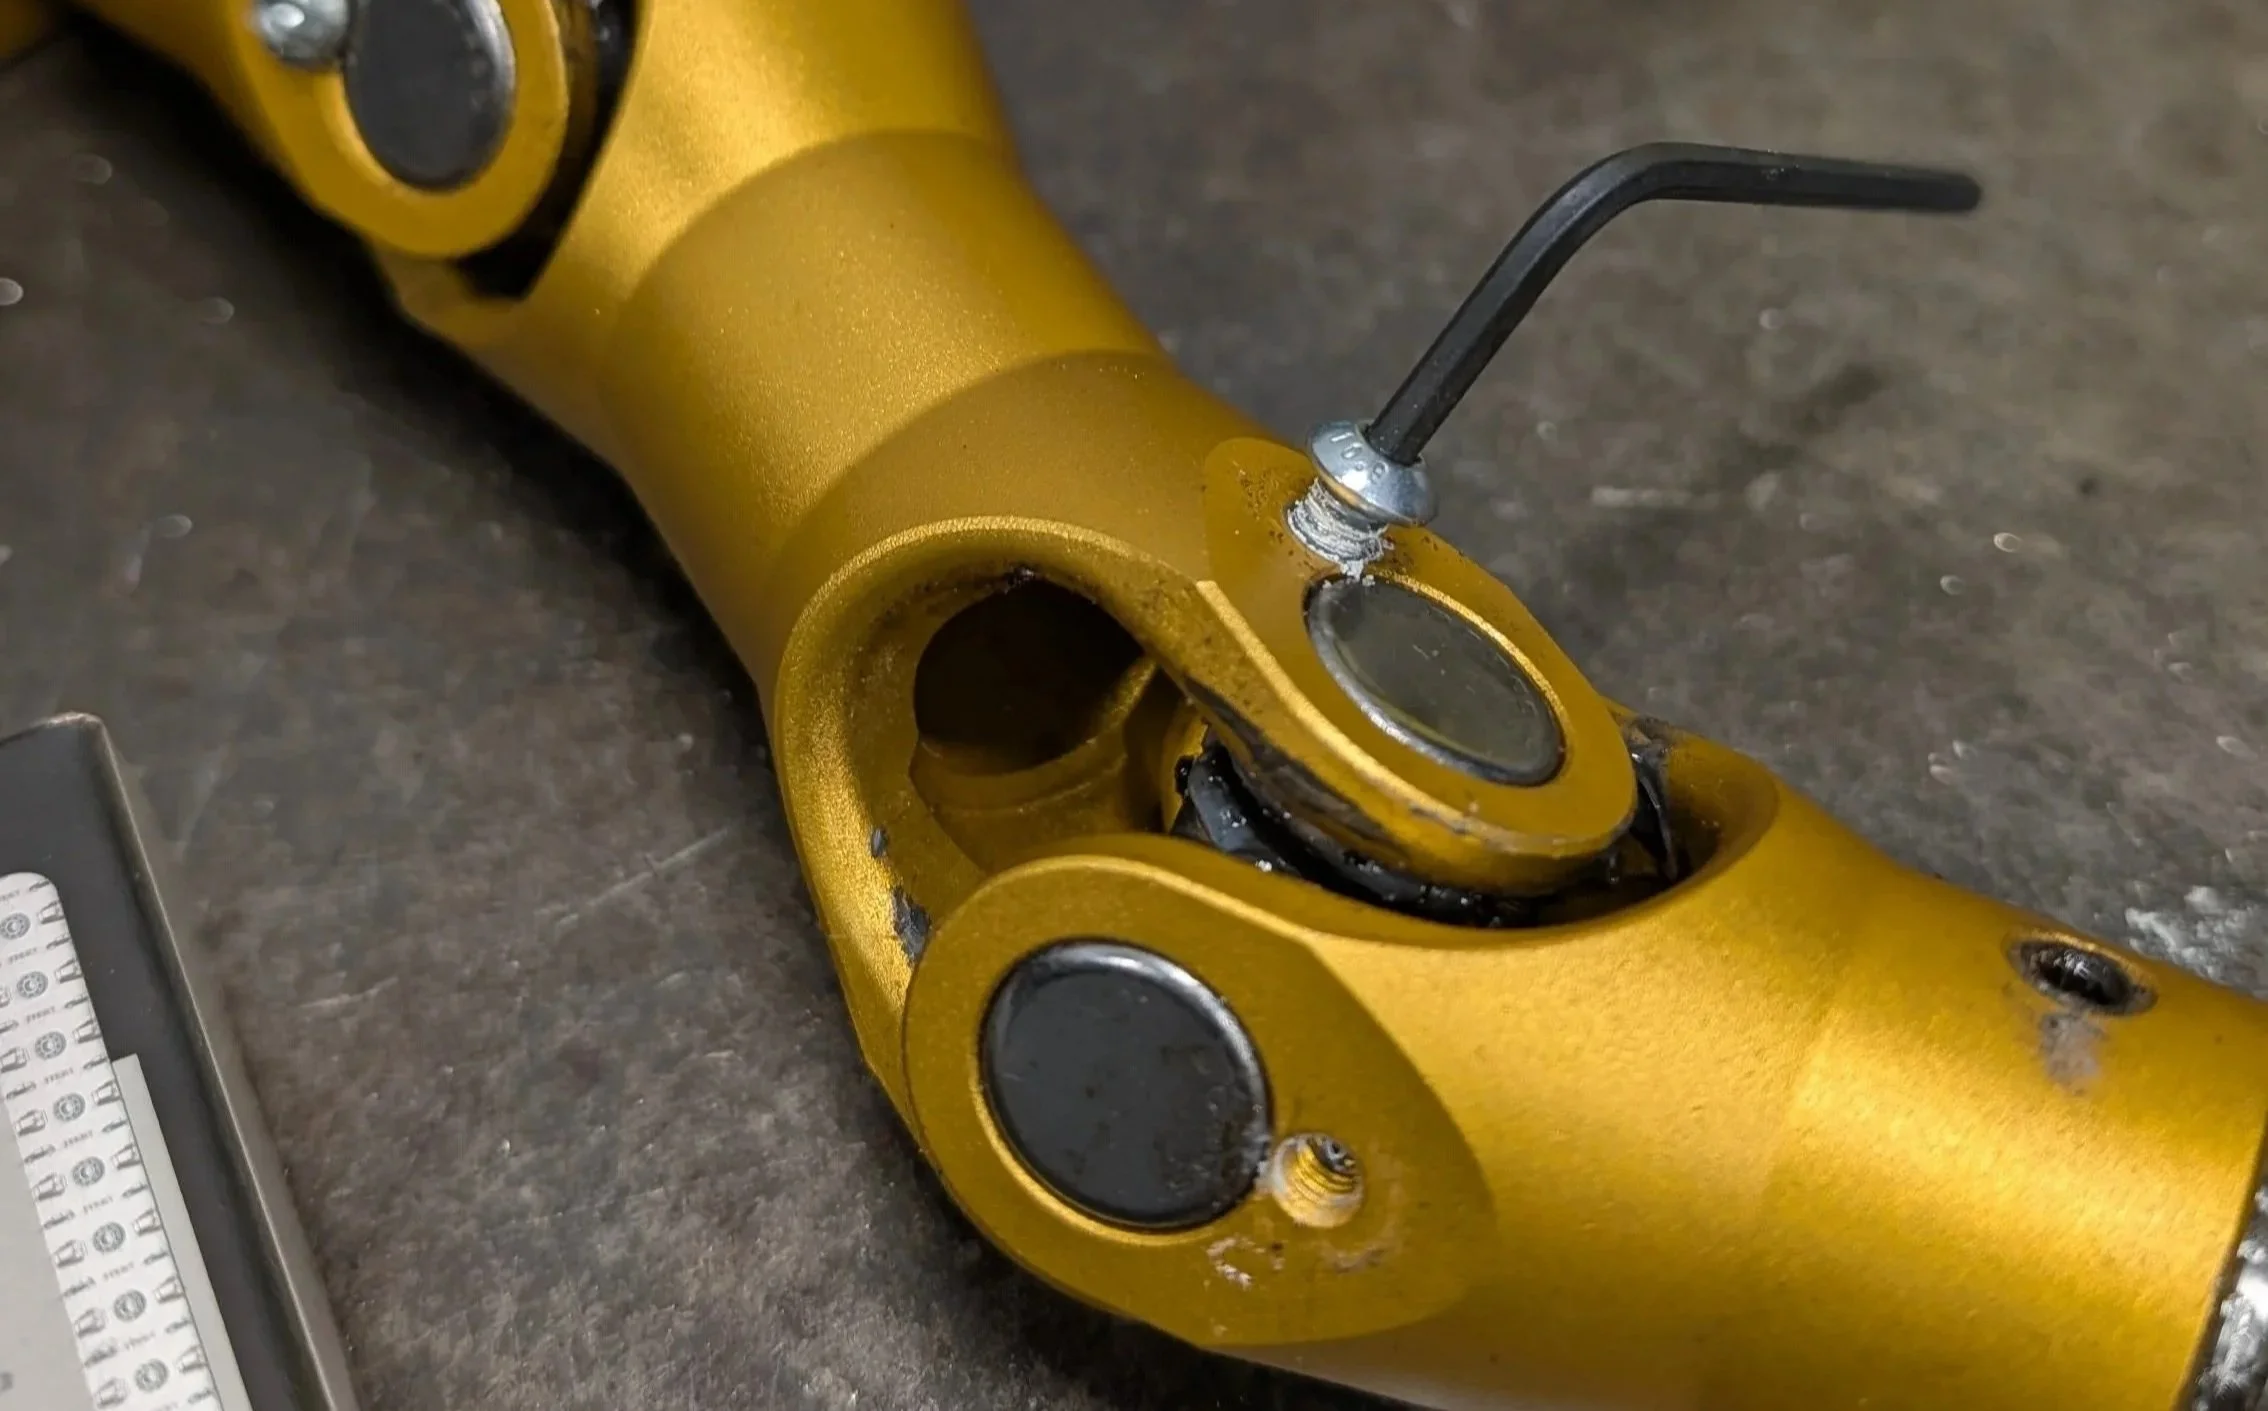
Step 2: Remove the cap retaining screws. There is one screw for each cap. These have a lot of locktite on them so be careful to get that Allen key firmly and deeply seated.
Step 3: (Sorry, I failed to get a picture of this). You want to push the cap out of the bottom. One way to accomplish this without any special tools is to push the cap on one side inward such that it pushes the cap on the other side outward. This means a socket to receive the cap being pushed out (I found a 16mm was a good size) and one socket to use to push (I used a 9mm). I used a bench vise to press the 9mm socket in, which in turn will push the entire U joint sideways and push the opposite cap into the 16mm socket.
Step 4: The spider (cross) is captive in the yoke and can’t come out so pushing the caps from one side to the other means the cap doesn’t fully exit. You need to “pull” it off the end of the cross. To make sure I didn’t mark up the nicely anodized yoke, I grabbed the old caps with vise grips and gently used a pry bar while rotating the cap back and forth. This worked quite well to remove all the caps. In summary: push cap as far out as you can, then grab and remove.
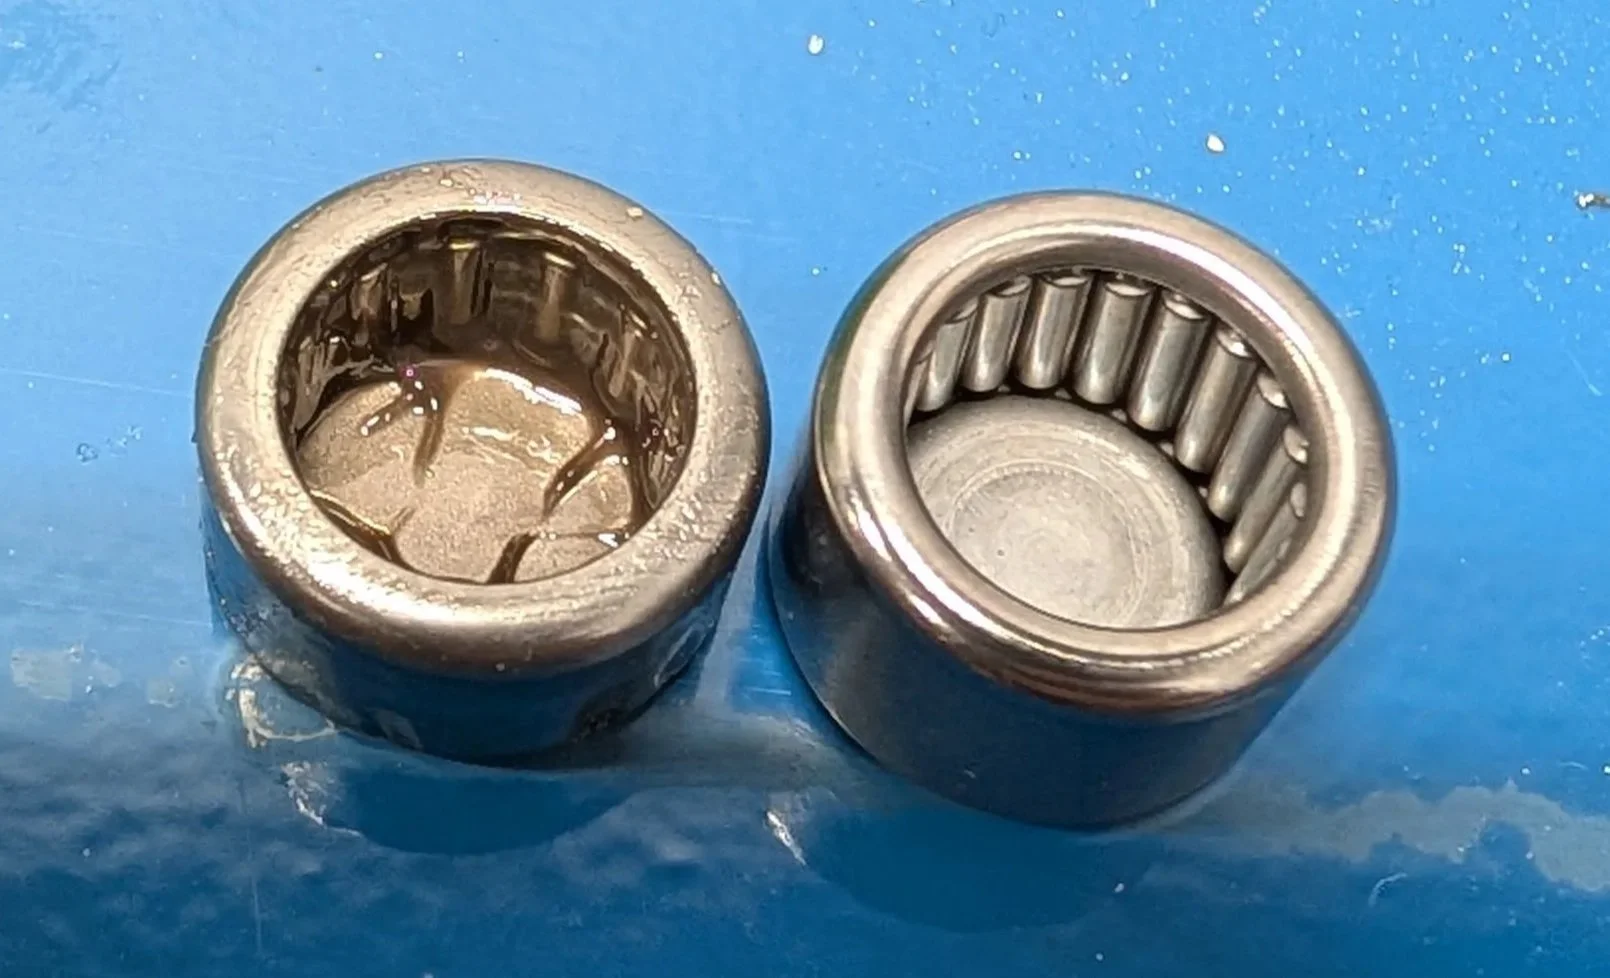
Step 5: You will notice the factory bearing on the left side has roughly half the number of needle bearings as the new ones from Rush of Carolinas (on the right). Not only does this mean they don’t wear out so quickly but the steering feel is notably improved. You will want to pack as much bearing grease as you can into these needle bearings. So get a finger full of that good synthetic bearing grease and go to town rolling grease into those needles.
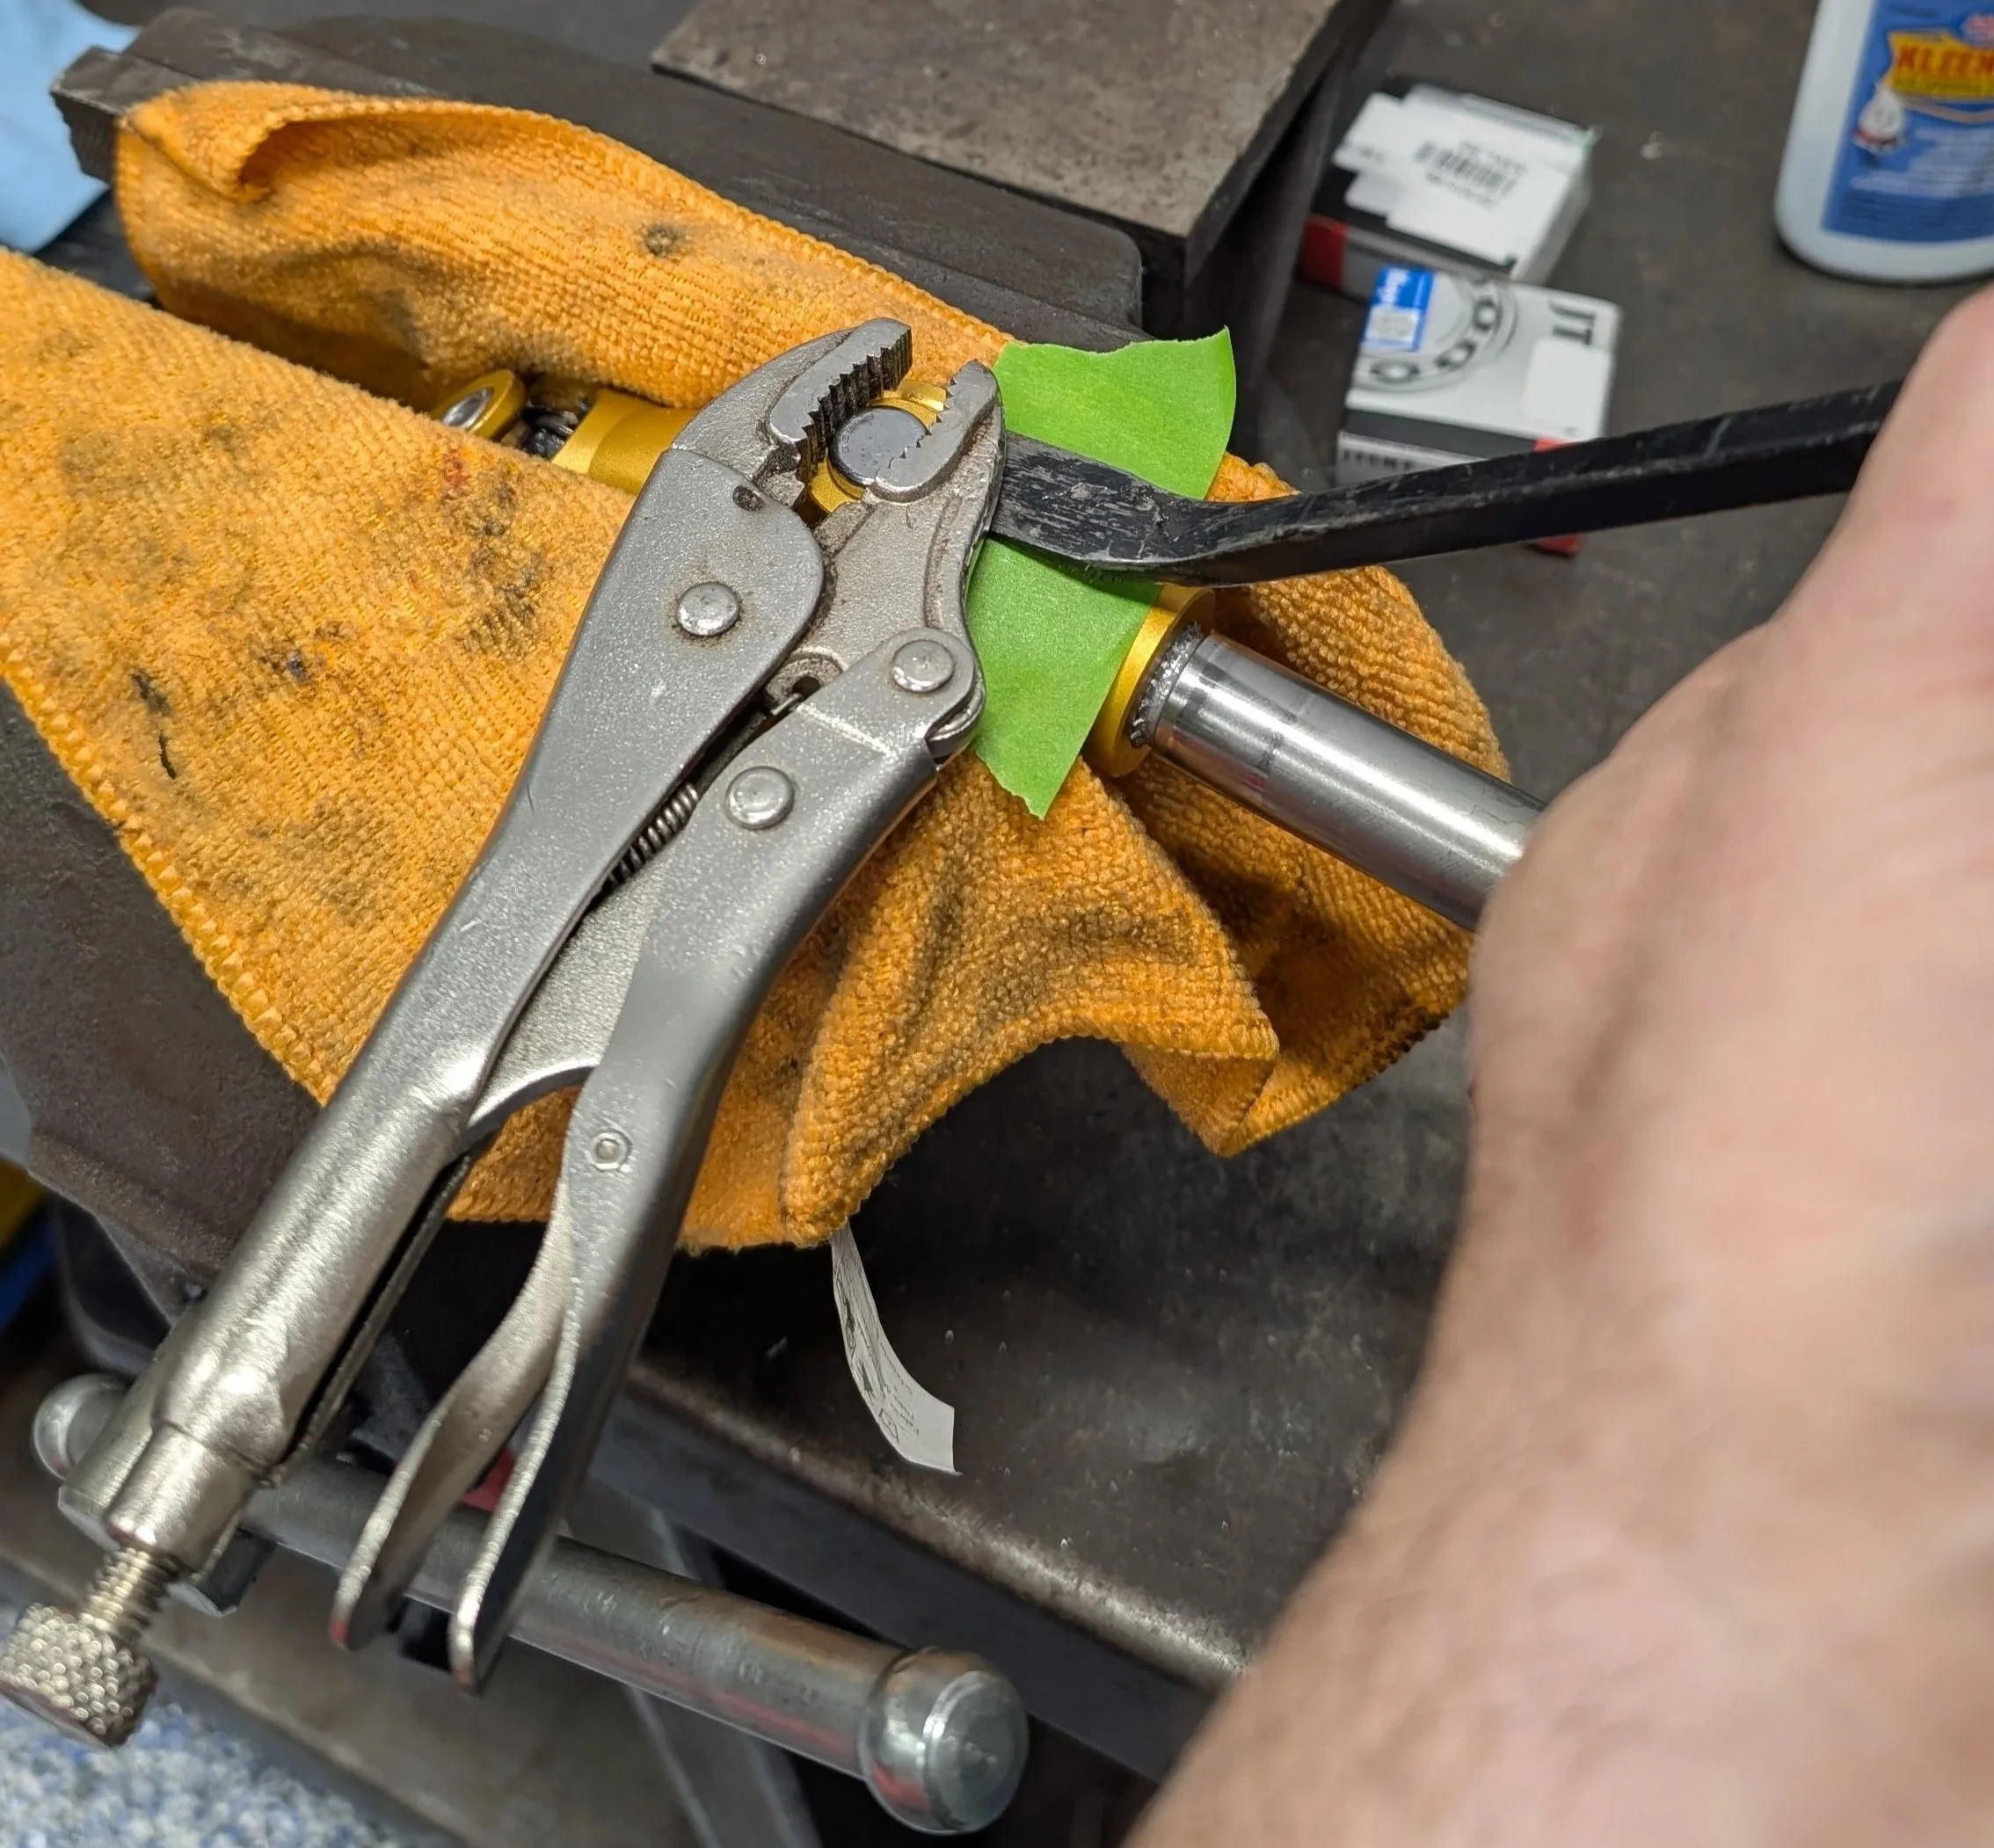
Step 6 is also lacking a photo, but very carefully install those new caps onto the spider. Best strategy here is to gently tap them just so they hold in place and then squeeze them in a bench vise going slowly and making sure they stay square to the yoke and the cross stays straight. This would be an easy place to destroy a needle bearing if you aren’t careful. Go slow and you’ll be fine.
Step 7: Re-install those bearing retention screws using blue loctite.
Step 8: Installation is the reverse of removal. Make sure you get the splines such that the steering wheel is back to straight when the wheels are straight before tightening everything up.